DFT Online Connection Guide
Connect via the DFT App
If you have not already, run through Connect from (Windows X or Mac OS) below and setup the password for the pilot you are going to setup.
To enter your duty and flight hours via your iPhone or iPad:
- Download the app from the App Store.
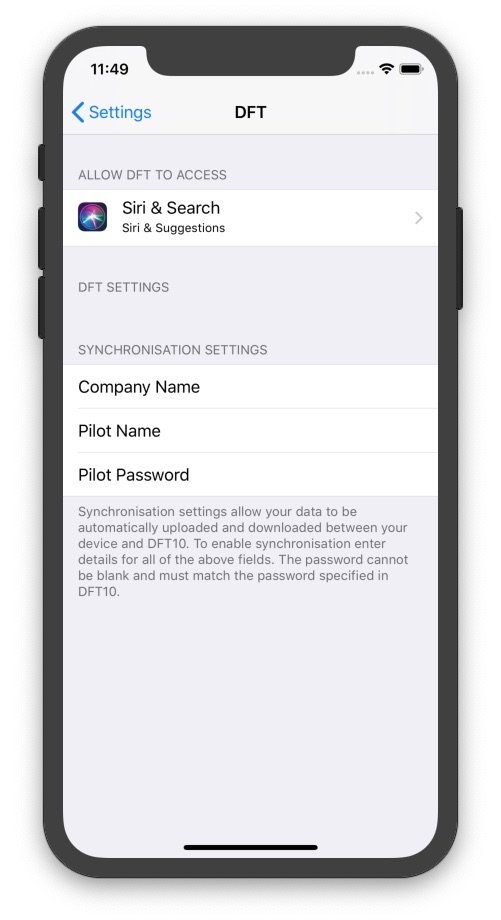
- Go to Home > Settings > DFT, and set:
- Set Company Name to Your company name
- Set Pilot Name to <Your name in DFT>
- Set Pilot Password to <Your DFT password>
Connect from Windows 10
DO NOT connect from a public computer! ONLY continue with the steps below if you are using a personal or work computer.
To connect from Windows 10/11:
- Make sure that you are connected to the Internet.
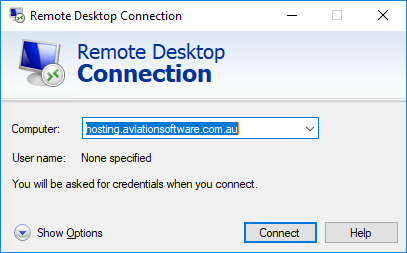
- Click the Start button then type "remote" and select Remote Desktop Connection
- Click Show Options if it is visible at the bottom of the window (otherwise it will say Hide Options
- Enter hosting2.aviationsoftware.com.au (or hosting.aviationsoftware.com.au if you are a customer before Nov 2024) as the computer to connect to.
- Go to Local Resources tab, and ensure Printers is checked in the Local Devices and Resources box. This allows printing reports to your local printer.
- Click Connect
- Type the user name provided by Aviation Software
- Tick Remember my credentials.
- This will log you into the server and automatically startup the DFT application.
- To return to your desktop, select Start > Windows Security > Logoff.
- To connect in future, start mstsc and the connection will be in your recent list.
Connect from Mac OS
To connect from a Macintosh:
- Ensure that you are connected to the Internet.
- Ensure Microsoft Remote Desktop is installed.
- Start Microsoft Remote Desktop.
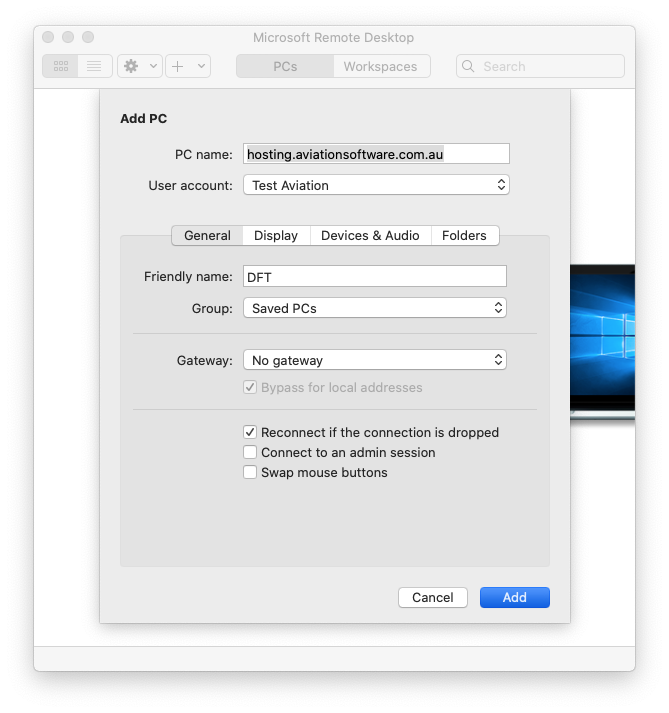
- Select Connections > Add PC.
- Set PC name to hosting2.aviationsoftware.com.au (or hosting.aviationsoftware.com.au if you are a customer before Nov 2024).
- Set User account to Add a User Account
- Set User name to the user name as provided by Aviation Software.
- Set Password to the password as provided by Aviation Software.
- Click Add.
- Set Friendly name to DFT (or something else you would prefer).
- Select Devices & Audio tab and check Printers. This allows printing reports to your local printer. Also ensure that your default printer is setup as A4 so that your reports print:
- > System Settings > Printers & Scanners > Default Printer
- Default paper size > A4
- Click Add.
- Double click the DFT connection.
- This will log you into the server and automatically startup the DFT application.
- To return to your desktop, select Start > Windows Security > Logoff.
- To connect in future, start Microsoft Remote Desktop and double click on the DFT Online connection.
Connect from iPad
NOTE: These steps are ONLY for DFT administrators that require full access to all of DFT's features. If you only need to enter your flight hours then you can download the DFT app from the App Store here.
To connect from an iPad:
- Make sure that you are connected to the Internet.
- Ensure Microsoft Remote Deskop
 is installed (or another RDP client)
 - Start RD Client
- Tap + to create a new connection
- Tap Add PC
- Tap PC Name and enter hosting2.aviationsoftware.com.au (or hosting.aviationsoftware.com.au if you are a customer before Nov 2024)
- Tap User Account > Add User Account
- Tap User Name and set to the user name as provided by Aviation Software.
- Tap Password and set to the password provided by Aviation Software
- Tap Save > Back
- Optionally, tap Friendly Name and enter DFT
- Tap Save You have completed the setup for Remote Desktop.
- Suggestion: Tap DFT Online at the top of the screen, and then tap the pencil icon at the top left, to display the mouse cursor on screen.
- To return to Microsoft Remove Desktop, select (from the bottom left-hand corner) Start > Windows Security > Logoff.
- To connect in future, just select DFT to automatically connect.
Connect from Windows 8
DO NOT connect from a public computer! ONLY continue with the steps below if you are using a personal or work computer.
To connect from Windows 8:
- Make sure that you are connected to the Internet.
- Swipe in from the right edge of the screen, tapping Search, or if you're using a mouse, point to the upper-right corner of the screen, moving the mouse pointer down, and then clicking Search.
- Enter mstsc in the search box, tapping or clicking Apps, and then tapping or clicking mstsc.
- Enter hosting2.aviationsoftware.com.au (or hosting.aviationsoftware.com.au if you are a customer before Nov 2024) as the remote PC to connect to.
- Go to Local Resources tab, and ensure Printers is checked in the Local Devices and Resources box. This allows printing reports to your local printer.
- Click Connect
- Type the user name provided by Aviation Software
- Tick Remember my credentials.
- This will log you into the server and automatically startup the DFT application.
- To return to your desktop, select Start > Windows Security > Logoff.
- To connect in future, start mstsc and the connection will be in your recent list.
Connect from Windows 7
DO NOT connect from a public computer! ONLY continue with the steps below if you are using a personal or work computer.
To connect from Windows 7 / Vista:
- Make sure that you are connected to the Internet.
- Click Start, point to All Programs, point to Accessories and then click Remote Desktop Connection.
- Click Options.
- In the Computer list, type hosting2.aviationsoftware.com.au (or hosting.aviationsoftware.com.au if you are a customer before Nov 2024).
- Type the user name provided by Aviation Software
- Tick Allow me to save credentials. If only the Always ask for credentials check box is displayed then:
- Select delete from the "You can edit or delete these credentials".
- Tick Allow me to save credentials.
- Go to Local Resources tab, and ensure Printers is checked in the Local Devices and Resources box. This allows printing reports to your local printer.
- Click Save As
- Save to the Desktop and call it DFT Online -- this will create a desktop shortcut you can use to connect again in future.
- Click Connect
- In the Log On to Windows dialog box that appears, type the password provided by Aviation Software into the Password box, tick Remember my Credentials and then click OK.
- This will log you into the server and automatically startup the DFT application.
- To return to your desktop, select Start > Windows Security > Logoff.
- To connect in future, just double click on the DFT Online shortcut on the desktop created in step 9.
Connect from Windows XP
DO NOT connect from a public computer! ONLY continue with the steps below if you are using a personal or work computer.
To connect from Windows XP:
- Make sure that you are connected to the Internet.
- Click Start, point to All Programs, point to Accessories and then click Remote Desktop Connection.
- Click Options.
- In the Computer list, type hosting2.aviationsoftware.com.au (or hosting.aviationsoftware.com.au if you are a customer before Nov 2024).
- Type the user name provided by Aviation Software
- Type the user name provided by Aviation Software
- Tick Allow me to save credentials. If only theAlways ask for credentials check box is displayed then:
- Select delete from the "You can edit or delete these credentials".
- Tick Allow me to save credentials.
- Click the Local Resources tab > click Printers in the Local Devices box. This allows printing reports to your local printer.
- Click Save As
- Save to the Desktop and call it DFT Online -- this will create a desktop shortcut you can use to connect again in future.
- Click Connect
- In the Log On to Windows dialog box that appears, type the password provided by Aviation Software into the Password box, tick Remember my password and then click OK.
- This will log you into the server and automatically startup the DFT application.
- To return to your desktop, select Start > Windows Security > Logoff.
- To connect in future, just double click on the DFT Online shortcut on the desktop created in step 9.
Migrate my DFT data
If you have existing DFT data that you would like to use with DFT online, then follow these steps:
- Run DFT on your computer that contains the pilot/s to export.
- From the Pilot Summary screen, select File > Archive (also called Archive / Transfer Data).
- Select the Automatic Backup tab.
- Select the Backup All button. This will create a complete backup of your data files - usually in the C:\Program Files\Dft6\PilotBackups folder.
- In the Automatic Backup Folder text box select/highlight all of the text.
- In the Automatic Backup Folder text box right-click and select Copy.
- Start Windows Explorer (Start > Run > Explorer > OK).
- In the Address text box right-click and select Paste and then select Go. This will list all of the backups for the past 3 months.
- Find the backup just created from DFT - it is prefixed with the date the backup was created.
- Email the file to hosting@aviationsoftware.com.au and include your company name in the subject header.
Receive data backups
Please contact us if you would like to use our free automated emailing service. This is useful if you would like to keep a copy of your data on your laptop and/or keep a backup. DFT email packages can be sent daily to a designated email address.
International (non-Australian) users
To setup DFT to use custom regulations:
- Start DFT.
- Open the pilot.
- Select Edit > Setup > Options tab.
- Set Regulation to (Custom).
- Select the ellipsis (...) button to open the regulations and customise them to your requirements.